
A lot of our ideas for updated or new features come from talking to our customers who are using our software on a regular basis and know what could make data visualization even simpler. That’s how our idea for data warehousing lite came to us, which we are happy to introduce to you as Snapshots.
Snapshots are a powerful way to automatically create historical data, so you can start identifying trends over time that ultimately lead to better business decisions.
So, what are Snapshots?
Some of our customers tell us that they get pretty frustrated with their PSA, RMM, or other tools because they don’t take daily timestamps of some data, which makes it impossible to retrieve certain KPIs.
That might sound confusing, but here’s an example. Let’s say you use ConnectWise Manage to track your tickets. While certainly a great tool, it doesn’t store your end-of-day ticket count, so you can’t go in and see how your backlog is trending over time. Enter Snapshots.
Think of it as data warehousing lite. Snapshots will store the data that your PSA or RMM won’t. And it’ll capture that data automatically.
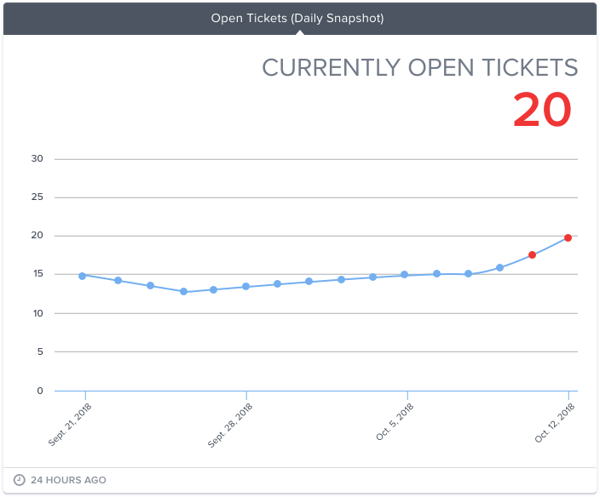
Store end-of-day ticket count, sales pipeline, number of hours per endpoint, employee count, tickets per endpoint - there are so many opportunities here.
Once set, you can pretty much forget about it for a while. A week, month, or year down the line, though, you’re going to look at that Snapshot gauge and have meaningful data insights that will impact the business decisions you make.
How do I set it up?
This part is super easy.
Go to any of your Number gauges, and click on the Snapshot icon (looks like a camera) on the top right of your gauge.

Just like that, you’ll have converted your Number gauge into a Snapshot gauge.
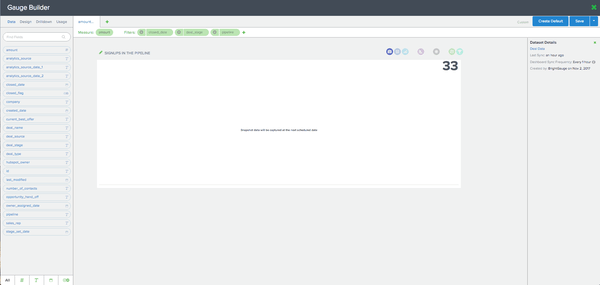
Or, build a gauge from scratch and make sure to select Snapshot when you’re ready to choose a gauge type. By default, the gauge is set to a Table gauge, but you can easily change this by clicking on the Snapshot gauge type icon (the camera).
Of course, you won’t see any data from the onset, as you need to give this gauge time to capture the data you’re looking for, based on the schedule you’ve set.
To set a schedule, you’re going to go to your Snapshot gauge, click the Design module on the left, click on Schedule, choose Daily, Weekly, or Monthly, and set a time preference.
Now sit back and relax. The rest is in our hands. Snapshots will automatically be captured behind-the-scenes.
For detailed instructions on how to set up your Snapshots, check out our knowledge base doc.
I want to do this! Can I get access to Snapshots?
The Snapshots feature is available to our Enterprise Plan users only and allows for up to 25 Snapshot gauges. If that’s you, you can start creating Snapshots today. Try it out!
If you want to talk to one of us about upgrading, contact us today and we’ll get you started.

Free MSA Template
Whether you’re planning your first managed services agreement, or you’re ready to overhaul your existing version, we've got you covered!